 |
| A station surrounded by rock spires. |
I've had a few requests for some terrain building posts so we will kick of the rebirth of the blog with some detailed instructions on building one of my staple pieces of terrain, Rock Spires. One of the great things about these pieces of terrain is the fact that they only use one piece that is very common and comes in a variety of earthy colors. In fact, many pick a brick walls in Lego stores carry the piece so it's easy to get them in large quantities on the cheap. Also, if you want to make your spires a little greener like mine, a lot of Lego stores also have the bamboo leaf and flower stem pieces as well.


The piece in question the Brick, Modified 1x2 Log, an extremely useful piece due to the fact that they can "bend" while holding a solid connection unlike normal bricks (as shown in the picture on the right). So, step 1 in building a rock spire:
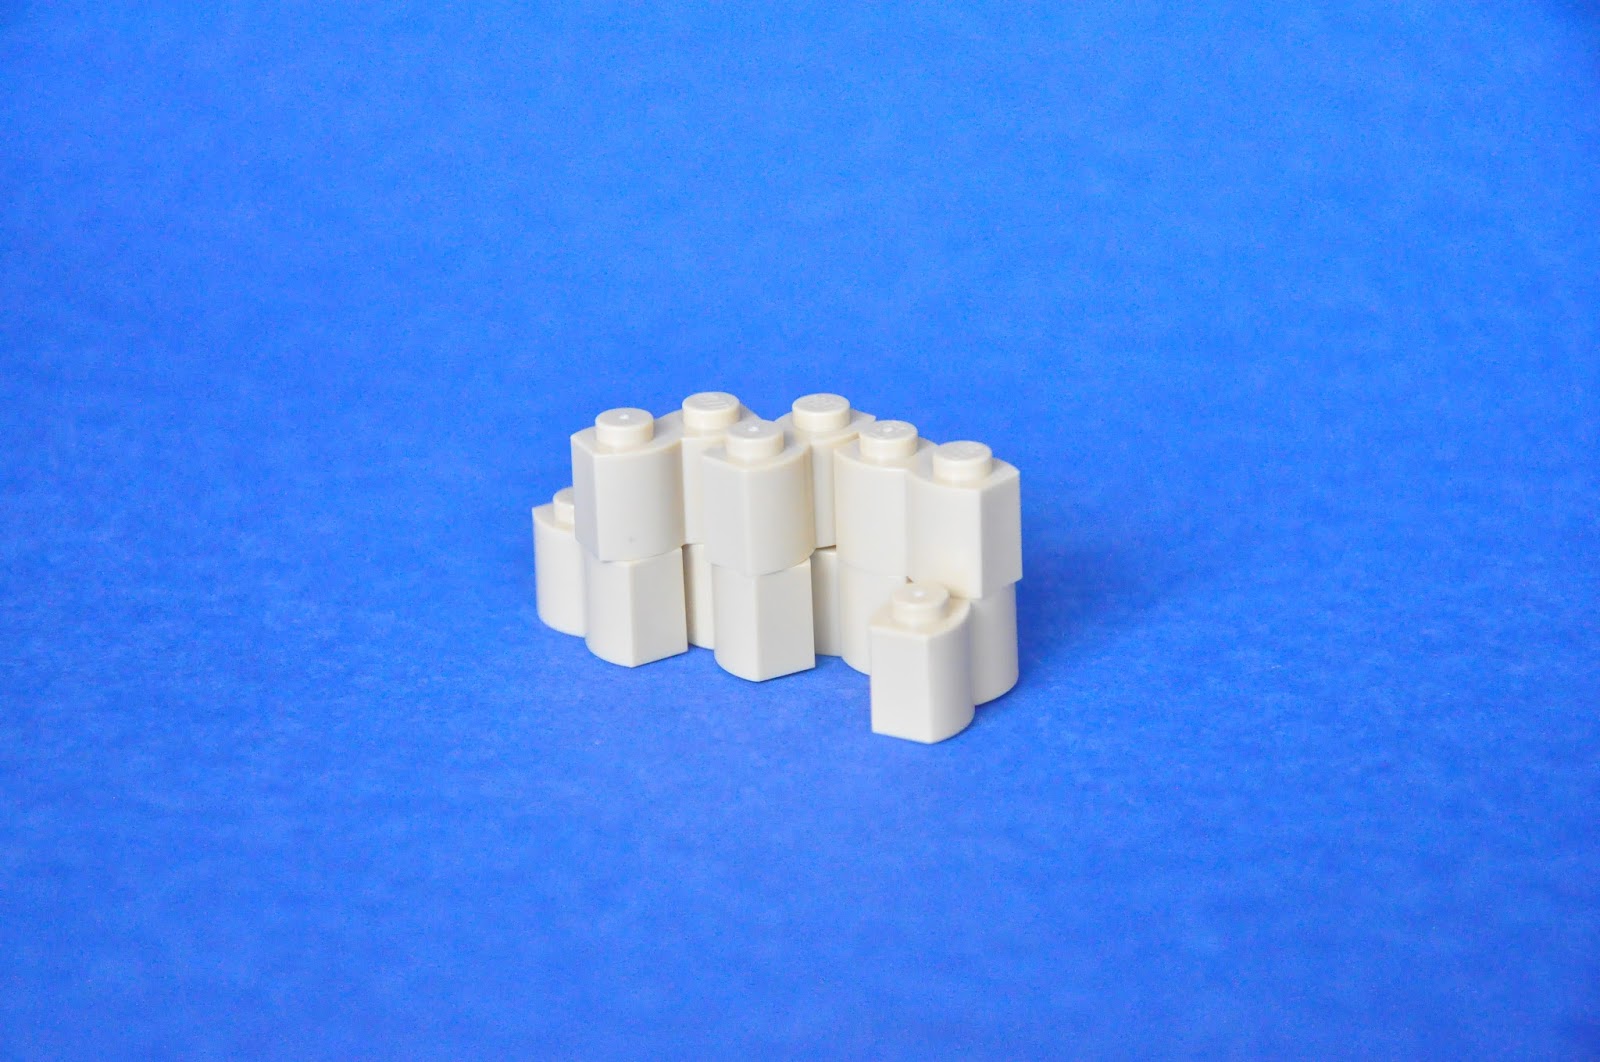

Start by piecing together a 2 high staggered set or bricks until you create the base of the spire. Make sure to work the bricks around in a way to create some nooks and cranny's in the sides of the spire, otherwise it will look very plain.


Start bricking up the third and fourth layer. Try to overlap your bricks so that you're strengthening the connections of the bricks below and varying the pattern enough to make things look more like a natural rock formation. Once I've got a few layers I like to pick one or two spots and build a little spire climbing up out of the formation as well.

Now, if you'll notice, the bottom couple layers of the spire are rather boring. They are very uniform and uninteresting compared to the rest of the spire. To help liven things up, we're going to take more log bricks and sprawl them out from the bottom, creating another layer below the initial two. Try to make each brick stick out, or create crevices, don't worry too much about improving the structural integrity at this point as it should be pretty solid already and the bottom layer will never be removed from play as it only counts as cover when it's 3 bricks high.

Now that you've finished that up, things should be looking pretty good. Now all that's left is to add some foliage to make it pop a little more.

And there you have it! The other great thing about this technique is that you can create whatever kind of rock formations you like. These examples would be great for a sandstone, or desert setting (like Orion 6!) or if you wanted a mossy forest vibe you could use dark brown and green bricks with more plants. Also, if you want walls it's really easy to shape a few of these together to create more interesting formations. What kind of cool formations can you come up with?
No comments:
Post a Comment